Animals
 Animation
 Art of Playing Cards
 Drugs
Drugs Education
 Environment
 Flying
 History
 Humour
 Immigration
 Info/Tech
 Intellectual/Entertaining
 Lifestyles
 Men
Men Money/Politics/Law
 New Jersey
 Odds and Oddities
 Older & Under
 Photography
 Prisons
 Relationships
 Science
 Social/Cultural
 Terrorism
 Wellington
 Working
 Zero Return Investment
This Stuff Is Dyn-o-mite
Wrapping It Up: 3D Studio Max ClassWhat we are actually experiencing is not an information explosion. It is an explosion of data. - Patricia Glass Schuman As in an explosion, I would erupt with all the wonderful things I saw and understood in this world. - Boris Pasternak Project 9:Particles and DynamicsOur assignment: to use particle systems, collisions, gravity and the track view curve editor. We were to build a 4-sided box using Booleans, to put a sphere into the box, to add gravity, a deflector and a particle array, connect them up and tweak their settings, to make the sphere emit particles, then disappear (in other words, to explode), then to play with it (adding a fire/smoke effect, particle spin, friction, sound, et cetera) until we were satisfied with the way it looked.
Click to begin: Cody's, mine, Wolf's In class we learned how to do simple dynamic simulations:
We learned about springiness, magnetic attraction, rigid and soft bodies, and adding weights at various points to increase inertia. "Dynamics" is a way to mimic the forces of nature.
I had less trouble with this project than I have the past few. I decided to make my exploding sphere into a bomb with a fuse. I thought I could use a super spray on a pathdeform and put a glow lens effect on the burning fuse. To my surprise, I couldn't move the spray to the path. Not to worry! MAX supplies something called a mesher - a mesh copy of a non-mesh object that behaves similarly and WILL allow effects to be supplied. Wolf wanted to do something a bit different from a sphere in a box. He meticulously modelled his bedside lamp and had a bulb flicker, then explode in a blue flash. Cody's checkered soccer ball also uses a lens effect star.
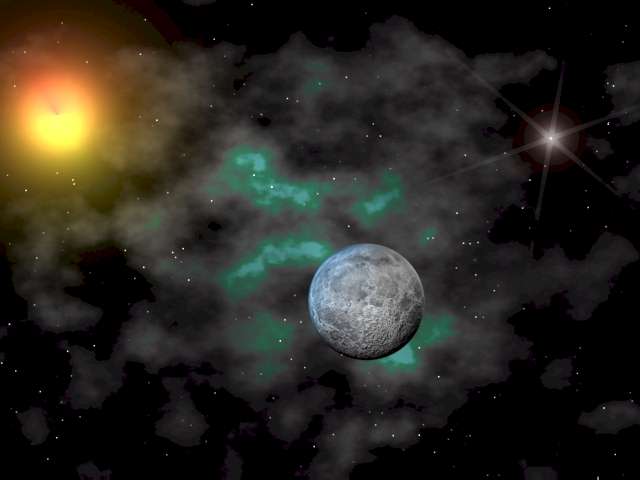
Project 10: Video PostOur assignment: to use lens flares on lights to make a sun and bright stars, noise texture maps for nebula (an interim step to enable us to understand the limitations of this technique), and a video post starfield. We were to build planets, moons and/or asteroids and texture them, then build a background nebula using noise and a 3-colour gradient ramp. We were to build a sun and one or more stars using various lens effects with appropriate settings. After we were done, we were to add a camera and do a flyby - this revealed that the background nebula had no depth. So we removed it and made a nebula using volumetric fog.
Click to begin: Cody's, mine, Wolf's In class we learned that when video post effects are applied, it is important to remember to render from the video post window instead of the normal render. (I discovered after an 8-hour render that I had forgotten this little details. I won't forget it again. Ever.)
This project was fun. I wished I had had more time to spend on it. I found the noise background nebula was easy and looked reasonably good (see below). But I was less impressed with the volumetric fog. I tried to use it for the Milky Way, but found it looked too uniform overall and I couldn't easily make it curve into a ring. So I inactivated it and used a giant tube instead. I plastered the inside of this tube with a UVW map which I made of several photographs of the Milky Way pieced together. Okay, so it isn't perfect. But trust me - it looks way better than my fog did. I intend to revisit this project during the term break and experiment with particle arrays and wind to give the sun realistic solar flares. I found I rather like modelling outer space.
Click here for:
Click here for:
Click here for:
In our Modeling Techniques class we learned how to model a face with patches starting from front and side view photographs. (We will model our own faces in next semester's class.) We learned about morphing techniques that can be used to make the mouth speak. We saw a demonstration of the use of meshsmoothing, NURBS, lofting, landscape techniques and UVW unwrapping. If you're interested in having a any of the files, please contact me. We are using version 5 of 3D Studio Max (because that's what we used in class - this was in 2003 after all). We're all hoping that for next semester's advanced class we'll get to upgrade to the new Max 6. (And we did...) Advanced 3D Studio Max projects
For more animation, video clips, and shockwave games click the "Up" button below to take you to the index page for this Animation section where you will find all sorts of things. |